
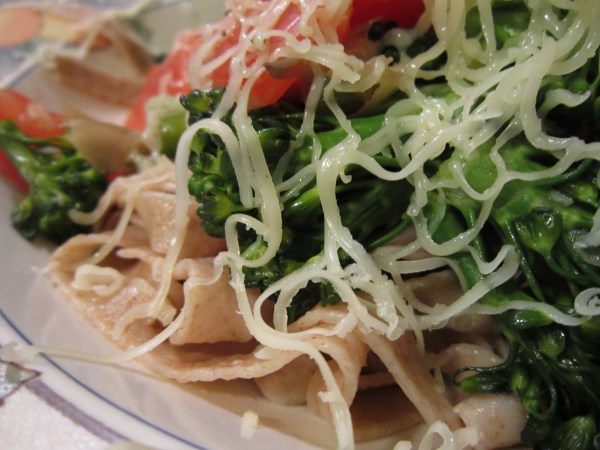
It has been awhile, but it’s finally time for my favorite spring and summer dish: pasta with fresh vegetables. Quite simple and yet oh so satisfying (and quite easy to make with local ingredients!).
It has been awhile, but it’s finally time for my favorite spring and summer dish: pasta with fresh vegetables. Quite simple and yet oh so satisfying (and quite easy to make with local ingredients!).

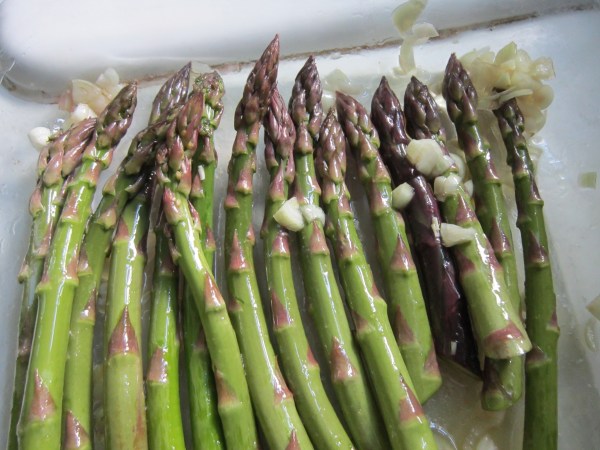
It’s been two weeks since I’ve been able to get asparagus at the farmers’ market and I think I’ve consumed about 4 pounds so far. Maybe 3.5. Thus is the nature of eating local!


Happy Food Revolution Day!

This weekend, take some time to make a home-cooked meal, plan how you’ll get to the farmers’ market, start your kitchen garden, or go foraging for some wild goodies!
I’ve celebrated the day by going to the farmers’ market this morning, helping a young neighbor pick her first strawberries, enjoying some homemade bread, and scheming about this week’s meal plan (more asparagus delights!).
Oh, and we also spent 2.5 hours riding bikes at this event — not exactly food-related, but still revolutionary! Over 550 people came out for this — it’s really great to see your community overrun with bikes (and yes, I won a prize!)! It was a little glimpse of the future…
 As an additional offering for this revolutionary day, I’d like to share a documentary called “A Farm for the Future” produced by the BBC. It might be the first mainstream documentary about permaculture, and it’s a great overview of why our current food system cannot/will not go on indefinitely. It also provides a positive vision about how permaculture could help provide the new direction we move in to feed ourselves (and to better care for the Earth in general!). Enjoy!
And remember to vote with your fork!


The list of reasons why I aim to eat as locally as possible keeps growing all the time, but some of my favorites include: it makes me feel more connected to nature and the seasons; it means that I eat more whole, non-processed food that is therefore healthier; and it is a great way to build and support our communities.
In addition to the psychological and health benefits that come from eating a local diet, it is also much more environmentally friendly in some very important ways. There are many, but I’ll focus on two here.
It reduces our carbon footprint.
The traditional Western diet is a fossil fuel hog. We use synthetic, petroleum-based fertilizers to feed our crops, we sow and harvest those plants with huge, energy-intensive machines, and to top it all off, the food is then shipped all around the world (using fossil fuels in planes, trains, and automobiles) for processing, packaging, and finally traveling to your location. Additionally, the very process of tilling the soil releases huge amounts of carbon into the air. In fact, the food system uses more fossil fuel than any other part of our economy — somewhere between 19 and 37% of carbon emissions depending on what study you look at. What’s sick, and a true indication of how unsustainable this system is, is that it now takes 10 calories of carbon-based fossil fuel energy to make ONE calorie of food that you’ll find in a traditional supermarket. As Michael Pollan put it in his letter to the president published in The New York Times (2008), “When we eat from the industrial-food system, we are eating oil and spewing greenhouse gases”.
Eating local changes a lot of this. Many local farmers are smaller-scale (less energy intensive) and use methods that reduce their dependence on excessive fossil fuel inputs and inappropriate tilling methods (farmers love to talk about their farms — ask about their methods if you’re concerned). Also, local food cuts out the midway travel-thon that most food goes through — food is either going directly from farmer to consumer, or processed at a local facility before being sold. There are not vegetables grown in California that are shipped to China for processing and packaging that are then shipped back to the Eastern United States for consumption (yes, this happens).
Anything that we can do to limit our carbon footprint is ultimately good for ourselves and other animals, including orangutans, because we’re taking steps to lessen the deleterious effects that climate change will have on disrupting ecosystems.
LOCAL FOOD DOES NOT CONTAIN PALM OIL
This is the big one for orangutans, and also relates back to the previous point drawing links between industrial agriculture, carbon emissions, and global warming. Huge swaths of rainforest land are cleared to support the industrial agricultural system, primarily for food like soybeans, palm oil, and cattle. Rainforests are storehouses of carbon that is then released into the atmosphere when they are destroyed (and then the food grown there is shipped around the world for processing and traveling to markets further exacerbating the issues at hand).

Forest in Merawang Subdistrict, Bangka County, Bangka Island being cut for palm oil plantation. (Photo credit: Wikipedia)
As serious and life-threatening as global warming is to us and all other animals, there are more obvious casualties happening daily because of the conversion of rainforest to plantation. The battle between palm oil plantations and orangutans is a particularly brutal one.
Orangutans need large areas of land to find enough food to support their large body size. They also are extremely intelligent and form mental maps of where their preferred feeding sites are located. They roam between these sites, knowing at what time of year they must be in certain locations to find the most energy-rich foods.
When someone comes and cuts down the forest where orangutans live it is not easy for them to just pack-up and relocate to a new area of forest — it might be occupied by other orangutans who have already capitalized on all that food, and they haven’t learned where all the feeding locations are outside of their home range. It would be like losing all of your current ways of procuring food — what would you do? How would you find food?
And so, many orangutans continue to hang out in the palm oil plantations where they are then considered nuisance animals by the palm oil companies that then trap, shoot, burn, or leave orangutans to reach any number of horrible ends.

This orangutan chewed off its own arm to escape a trap set in a palm oil plantation. Luckily, it was found and saved before dying. It will likely be re-released into the wild. Photo: Caters. Click on photo to link to article.
What to do?
Some palm oil activists have advocated boycotting palm oil products, but focusing on a boycott of industrialized products can be maddening. Almost half of the processed products you find have some derivative of palm oil.

A few of the thousands of products with palm oil.
Other palm oil activists suggest supporting companies that have signed on to the Roundtable on Sustainable Palm Oil (RSPO), which aims to “promot[e] the growth and use of sustainable oil palm products through credible global standards and engagement of stakeholders.”
The problem with the RSPO is that it is greenwashing. Crops grown in monoculture systems such as palm oil are inherently unsustainable, and it will never be sustainable for people in the United States and Europe to depend on a crop that was grown in Southeast Asia. It has to fly all over the world for processing, packaging, and delivery before it reaches us, creating unnecessary carbon emissions and waste.

Monoculture palm oil plantation. (Photo credit: angela7dreams)
Additionally, the companies that have signed on to the RSPO, while they might be interested in having good PR this way, are still huge corporations with questionable practices happening at every other level of production. And the food is probably not healthy for you.
Instead, let’s embrace diets and lifestyles that are beneficial on all levels — for orangutans, for our local environments (and therefore those abroad), our communities, our health, and to help stop global warming.
The best decision: eat locally from small, sustainably run farms. And grow your own food, too!
Let’s look at the food in my Midwestern United States diet in mid-May.

What is here? Foods grown and processed in Northeastern Ohio including:
And I also depend on things like sauces, berries, other vegetables that I’ve frozen, canned, or dehydrated in other seasons, and wild foraged foods.
What is not here?
I admit, this is more of a lifestyle change than just a diet change, and it takes time. Especially at this point in time, it requires skills that many of us have lost, planning that we’re not used to doing, and time for processing and preparing our food that has to be reclaimed.
I’m certainly not perfect with this as I still depend on some products that I can’t find locally or don’t know how to replace, and I am still learning skills and how to create a life that affords me the time and space to work with food in a way that I find meaningful. However, we have to start somewhere.
The joys that come from moving to a more local diet make it well worth the effort (REAL, fresh strawberries are back? Hallelujah!), and it provides a sense of power when so many sad, maddening things are happening to our world’s ecosystems and animals. You can know that you are truly taking steps toward making the world a better place, and other people will learn by your example.
If you still want to do more, check out Orangutan Outreach, Slow Food, Millions against Monsanto, watch documentaries like Food, Inc., and sign petitions to stop destructive agricultural practices when you see them pop up.

Click for More Resources
Also, be sure to find local farms and farmers’ markets in your area: Local Harvest
Linked up at:


Here are the ingredients from the original recipe:
And here is what I used instead:
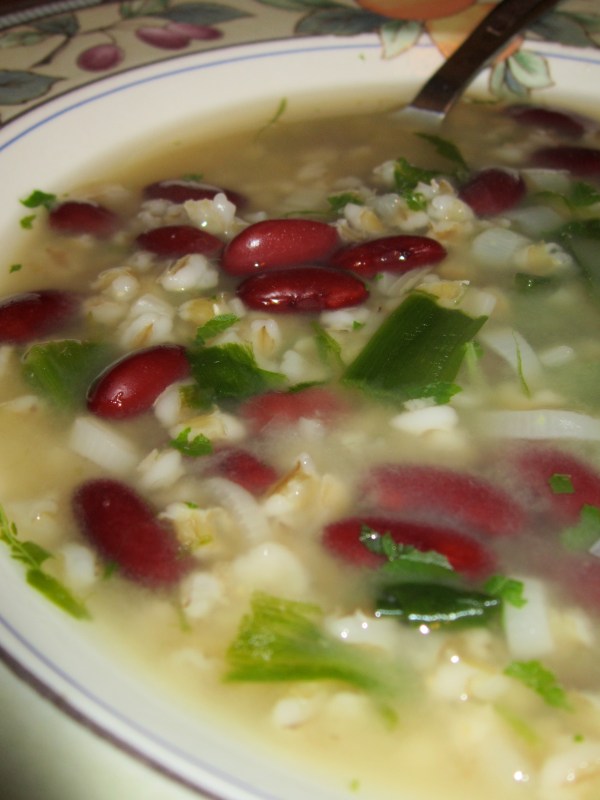
I thought this recipe would be better with the addition of some protein (the beans), I excluded a vegetable that is not in season (the celery), and I was excited to try my whey as a stock in addition to some vegetable stock! I also added some additional barley, but you might want to add even more if you give this recipe a go.
Directions:

Ramp, barley, and beans soup
I’m not sure why my version doesn’t seem nearly as green & creamy as the photo used by the magazine. Maybe this is because I didn’t use my good blender (too much clean-up to make soup!), or because I didn’t use enough ramp greens (some were yellowing as the season ends…), or maybe they were cheaters and used food coloring!
Either way, the meal was tasty & (mostly) local, but would have been better if I had found time to bake bread to go with it! Next time…
Also on ‘these light footsteps’:

It’s official. I made my own cheese.
It’s been on my to-do list for quite some time now, but other projects have continued to get in the way. Also, I have a reliable source of cheese each week at the farmers’ market that has made it easy to neglect this to-do item. But…he doesn’t sell cheeses like ricotta.
I also think it’s inherently valuable to learn these skills on our own — it helps to save money and to bring us closer to where our food comes from. It also helps in my quest to eliminate disposable food packaging from my life (what a waste and a huge hog of landfill space!). If you make your own ricotta, you don’t have to buy a plastic container of it!
Isn’t it amazing that in just a generation or two skills like this have been lost by so many people? There are a great number of us that no longer have words like curds and whey in our vocabulary yet continue to consume a lot of cheese (often from questionable sources!).
I intend to keep the skills of self-reliance and food intelligence alive!
Plus, it’s really easy!
All you need is milk + heat + an acid (vinegar or lemon juice) to make ricotta. To get into the harder cheeses, you need to start involving rennet in the equation (that will be next in my cheese-making endeavors).
To make 1.5 – 2 pounds of ricotta (which it turns out is a lot of ricotta and you might want to start with half of this recipe), you need:
Combine the ingredients and heat the milk slowly on the stove, stirring periodically, and work the milk’s temperature up toward 180*-190*. This should happen slowly — it might take anywhere from 30 minutes to an hour.

While you’re stirring, you might want to say an incantation such as, “Let there be curds!” and they will begin to appear! (Ok, you might not have to use magic, but it feels very magical when they begin to appear!) When the curds begin to form, remove the mixture from the heat source.
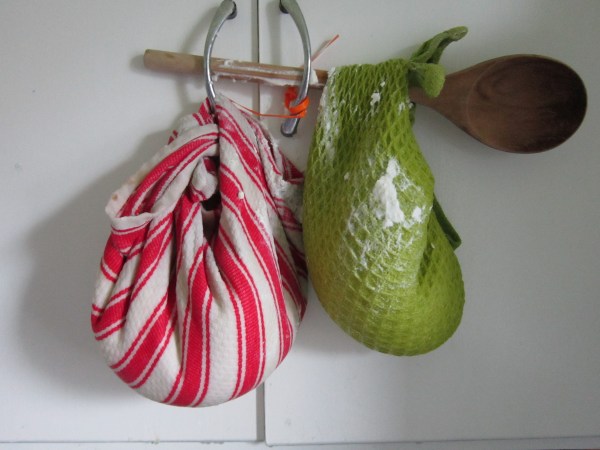
Let the mixture cool down for 30 minutes and then strain the curds from the whey by lining a colander with cheesecloth or a tea towel and placing a bowl underneath. The longer you let the whey drain out, the drier your cheese will be. I actually put mine in the fridge and let it drain out overnight.
The next morning, I realized that so much whey had drained out that the bottom of the cheese was getting wet in a puddle of whey. I got a bit creative to let a little more whey drain out.

Draining whey
But I was left with some delicious ricotta!

Fresh ricotta cheese
And I’ve also learned that there are numerous uses for the whey, so I saved that as well. It’s useful as a stock, to cook pastas, to sprout grains, and more! It’s full of healthy enzymes.

Whey
Stay tuned to learn what became of this ricotta…


When you make the decision to start incorporating more local and seasonal foods into your diet, it can initially be overwhelming because not many of us are used to working with the foods that are found in seasonal abundance. It forces us to get a bit more creative with our cooking.
So for example, with ramps being abundant right now I’ve made them into pesto, chopped them into salads, sauteed them as toppings, and yesterday I tried what I’ve gathered to be the “authentic” West Virginian way to eat ramps — with beans (and cornbread). And I still have a few more tricks up my sleeve before the ramps disappear! (Stay tuned…)

Ramps and beans (and mushrooms)!
Another popular item at farmers’ markets in the Spring is kale. I suppose I had started to learn about kale before trying to be quite as much of a locavore as I am today, but it’s definitely not something that I grew up eating. And when you’re not used to eating greens like kale and collards, they can be intimidating. But greens like kale are good to incorporate because they’re so darn healthy!
I think I first started to actually like kale because of kale chips. I believe they’re relatively palatable even to the novice kale eater, and yet they start to break you in to kale’s bitter charms.
There are many types of kale chips to make, but I think it’s best to smother kale in a delicious tahini sauce.
TAHINI KALE CHIPS

Kale Chips
Break the kale into bite-sized pieces and place into a large bowl (take out any of the thick stems). Mix all of the other ingredients in a blender, and then pour the sauce over the chips and mix it in well. Lay the coated chips out on dehydrator sheets or oven sheets.

Dehydrate at 115* for about 4 hours or until really crispy (some recipes call for up to 8 hours — I did this last batch for 6). You can also use an oven at 200* for about an hour, but check it often. I’m sure that some people have mastered the oven version of kale chips, but I haven’t had luck with that.
I realize that not all of these ingredients are local, but I think this is a good place to start experimenting with kale. And you can try to get as many of these ingredients as locally sourced as possible.
However, I was also able to devise a more locally-sourced kale recipe this week…
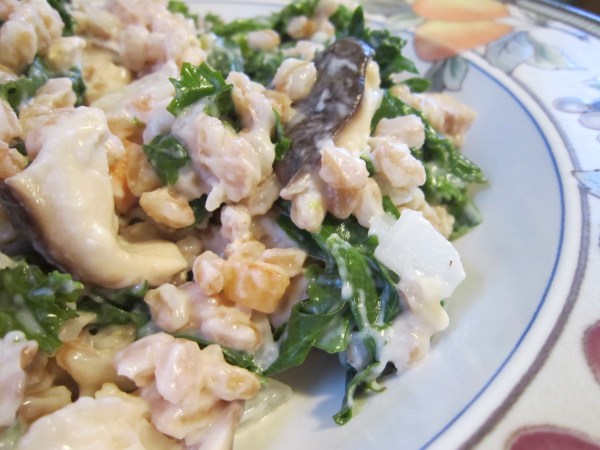
FARRO WITH KALE, SHITAKE MUSHROOMS, AND CHEVRE
I found some star ingredients at the farmers’ market that I was inspired to combine into this dish.

Start by sauteing the carrots, onions, and garlic in the butter until they’re soft and the onions are translucent. Add the mushrooms and cook for about 2 minutes. Add the kale and watch for it to wilt a bit and turn a darker color of green — this means it’s getting close to ready, and you can add the 2 cups of warm, cooked farro.

Stir it up
Mix all of this together and then add the chevre. Keep stirring this while the heat is low until the cheese is melted in and creamy. Local and delicious!

Farro with shitake mushrooms, kale, and chevre.
Linked up on the Homestead Barn Hop.
Also on ‘these light footsteps’:

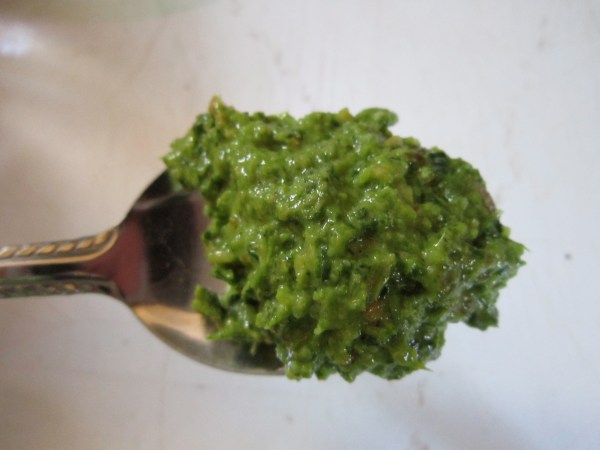
Wow. My brain’s pleasure neurons are still lighting up after discovering this one. Ramp + Oregano pesto, you have won over my heart and my mouth.

Ramp + Oregano Pesto Goodness
This week at the Tremont farmers’ market, one of my favorite farmers (from Por-Bar Farms) had a deal on ramps and oregano with the suggestion of making a pesto. I hesitated for a moment as I’ve been collecting so many of my own ramps, but I haven’t gathered any for a few days so I went ahead and got the deal. I am happy that I did as this makes a fantastic pesto!!
I looked around at quite a few recipes today, but didn’t find anything quite perfect enough for me, so I took what I learned and developed my own.
To make something similar, you will need:
First, you’ll need to chop the ramps.

Chopped ramps
Then you’ll need to pull off the oregano leaves and tightly fill a cup.

Bunch of oregano.

1 Packed cup of Oregano.
Measure out a heaping 1/4 cup of nuts and toast them. Pine nuts need to be toasted for about 5 minutes.

Heaping 1/4 cup of pine nuts.

Toasting pine nuts.
Add these ingredients plus the olive oil and cheese in a blender or food processor, and mix it all together! But don’t go for too long because it’s best to still have some texture in the pesto.

Pesto!
And then you can use this anywhere you desire an intensely awesome pesto! I tossed some of mine in a bit of tri-color pasta. Mmm. Depending on how much pesto you use at a time, I’d say this makes about 5 or 6 servings. It’s about 1 cup of finished pesto product (I have a lot leftover and even was able to freeze some).

Pesto Pasta
My only warning is that it is a bit strong. You can’t really give me too much onion/garlic, but if you’re sensitive to that taste, you may want to skip this recipe, or leave out some of the white bulbs of the ramps and focus on the green parts.
Also, I have to share that my salads are becoming increasingly exciting as the Spring picks up! This 100% local side salad included lettuce, radish, mushroom, carrot, and cheese (not yet grated for this picture) all gathered from the farmers’ market. Perfection!

Spring salad.


Outside of this strange world that we call the internet, I don’t know many people who would say that an ideal day is one spent in the woods learning about wild edible foods. But for me, a day spent meandering through the woods is in itself the indication of a day well spent, and to combine that with learning about and connecting with plants comes close to absolute perfection. Maybe other people just haven’t yet tried…

Behold the knowledge
Disclaimer: I have not tried eating all of the plants shown below and I am not suggesting that you do so without adequate preparation! My method generally goes something like this:
1) Find a plant and ID it in my field guide or learn about a plant and aim to find it and identify it.
2) Identify it on at least a few other ocassions.
3) Read about the plant and possible dangerous look-alikes.
4) Try a small amount to make sure it agrees with my body.
5) Eat more.
Let’s begin…
The dried corms (Wikipedia: a short, vertical, swollen underground plant stem that serves as a storage organ) of jack-in-the pulpits can be sliced and eaten like potato chips!

Jack in the pulpit
Japanese knotwood can be eaten like asparagus…and I encourage this one due to its invasive nature!

Japanese knotwood
Coltsfoot can be candied and I’m still looking to find a patch big enough so that I can infuse the flowers into honey as a cough remedy!

Coltsfoot
Chopped toothwort root can be substituted for horseradish.

Toothwort
I also hit a ramp jackpot! They were everywhere!

Ramp overload!

Dinner!
Wandering around this way also leads to other beautiful finds like Squirrel corn (I don’t have any idea about its edibility, don’t try!)…

Squirrel corn. Hehe - such a funny name.
And you also might come across extremely cozy patches of moss at the edge of a ravine. This is my version of ultimate renewal and peace. I once read that some Native Americans believe that excess energy accumulates in places like this (i.e., cliffs, edges). I think they are right – it feels so wonderful! Why don’t I do this every day?


I’m happy to provide more information to anyone who’s interested!
Go be in nature! Give in to your animal instincts and go foraging!

Did you know that pine needles can provide you with more vitamin C than orange juice? And that they can help to heal your body from respiratory ailments, colds, and the flu?
Some say that the Native Americans taught the early settlers about drinking pine needle tea to help prevent death from scurvy!
Pine needle tea is easy to make, but what are some other things that can be done with pine needles?
They can be infused into a variety of menstrums (liquids used to extract the nutritional or medicinal properties of plants) other than water. For example, tonight I got a nice dose of vitamin C by using vinegar infused with pine needles in my salad dressing. White pine needle vinegar (the type I made) tastes similar to balsamic vinegar.
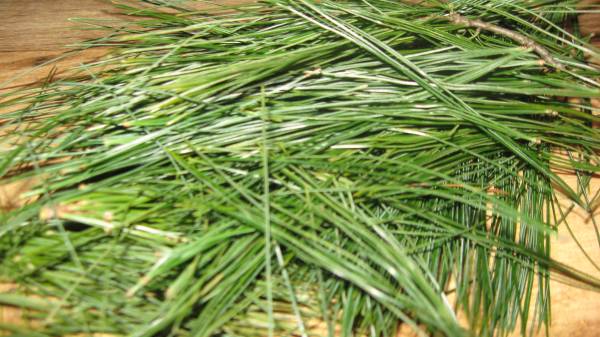
First, you’ll need to gather some needles. I collected a bunch from a white pine.

White pine needles
Pick through them to ensure the best ones are being added to glass jars. I also tore these up as I was adding them.

Fill the jar!
And then cover with the menstrum. In this case, it’s apple cider vinegar. I get large jugs of the raw kind so I boiled some first to ‘pasteurize’ it before making this vinegar (and I was able to boil enough extra for future use). Make sure to completely cover the needles — poke them down so that they’re an inch below the liquid line.

Let the finished product sit for 4-6 weeks before using. Also, use a plastic lid or put a piece of wax paper on top because vinegar will eat away at the lid.

White Pine Vinegar ready to be strained!
What’s another use for the pine needles? Infuse them in olive oil! The oil can then be used as a relaxing massage oil or as a chest rub to help with respiratory issues.
Cover a jar full of pine needles with the oil and let sit for 4-6 weeks.
 When you’re ready to use the oil, strain the needles out.

And you’re left with pine needle infused olive oil!

The oil can also be turned into a salve that can help to remove splinters (although it seems that the actual sap of a pine tree might be best at this!), or it can be put on small wounds to help them heal. I’ve also been having a fun time using it as a lip balm!
To make a salve, create an easy double boiler by putting a measuring cup into a pot of boiling water.
Add 2 Tablespoons of beeswax (I just guessed at the amount when I made this…) to the measuring cup and let melt.


After it has melted, add 2 ounces (1/4 cup) of the oil infused with pine. Stir with a chopstick until you reach an even consistency. Test to see if you’re done by putting a drop on your counter. It will allow you to quickly see if the salve is firm enough or too runny. Too runny? Add more beeswax. Too firm? Add more oil. 
When the mixture is consistent, pour it into a reused container and let sit to become a salve! Use and enjoy knowing exactly what went into your product!


