
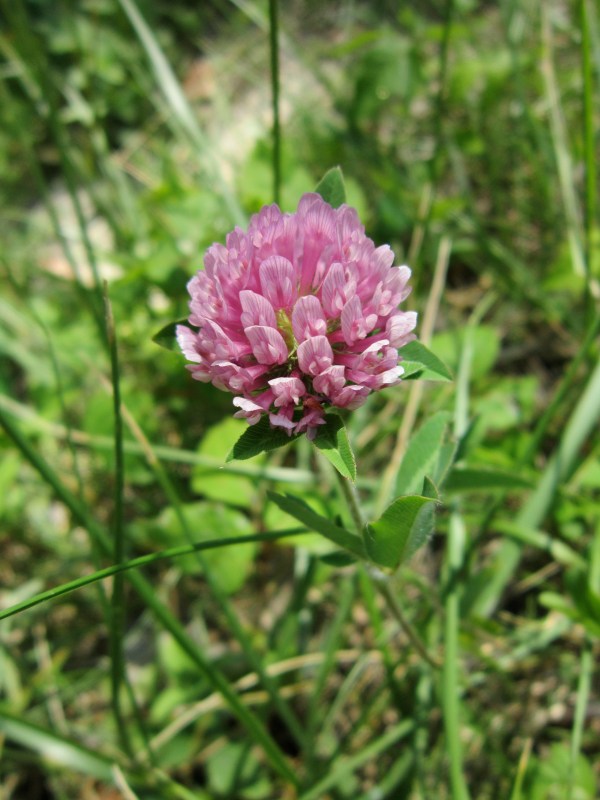
Ah, red clover. A versatile plant that helps with so many things — amusing young children in an attempt to find 4 leaves; food for grazing animals; medicine; and fixing nitrogen into the soil, to name a few.
Ah, red clover. A versatile plant that helps with so many things — amusing young children in an attempt to find 4 leaves; food for grazing animals; medicine; and fixing nitrogen into the soil, to name a few.

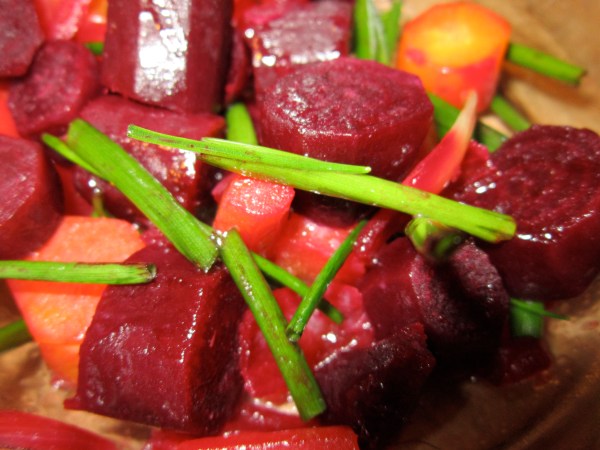
It might just be my increasing appreciation for beets, but I was talking out loud (to myself) and making grumblings of gustatory appreciation while eating this very simple meal.

It took me a month of working with my sourdough starter, but it finally resulted in a delicious loaf. It still needs work, but I think it was a darn good first try.

Fresh sourdough bread!


Here are the ingredients from the original recipe:
And here is what I used instead:
I thought this recipe would be better with the addition of some protein (the beans), I excluded a vegetable that is not in season (the celery), and I was excited to try my whey as a stock in addition to some vegetable stock! I also added some additional barley, but you might want to add even more if you give this recipe a go.
Directions:

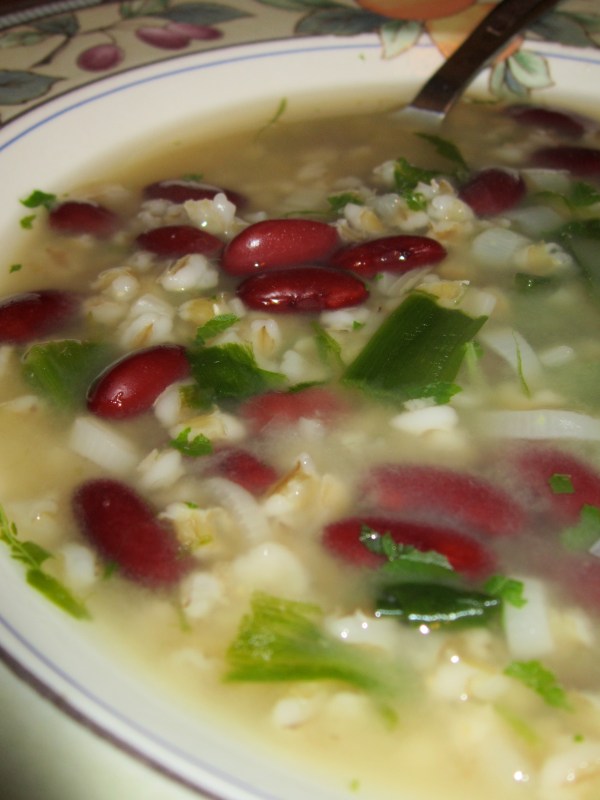
Ramp, barley, and beans soup
I’m not sure why my version doesn’t seem nearly as green & creamy as the photo used by the magazine. Maybe this is because I didn’t use my good blender (too much clean-up to make soup!), or because I didn’t use enough ramp greens (some were yellowing as the season ends…), or maybe they were cheaters and used food coloring!
Either way, the meal was tasty & (mostly) local, but would have been better if I had found time to bake bread to go with it! Next time…
Also on ‘these light footsteps’:

Outside of this strange world that we call the internet, I don’t know many people who would say that an ideal day is one spent in the woods learning about wild edible foods. But for me, a day spent meandering through the woods is in itself the indication of a day well spent, and to combine that with learning about and connecting with plants comes close to absolute perfection. Maybe other people just haven’t yet tried…

Behold the knowledge
Disclaimer: I have not tried eating all of the plants shown below and I am not suggesting that you do so without adequate preparation! My method generally goes something like this:
1) Find a plant and ID it in my field guide or learn about a plant and aim to find it and identify it.
2) Identify it on at least a few other ocassions.
3) Read about the plant and possible dangerous look-alikes.
4) Try a small amount to make sure it agrees with my body.
5) Eat more.
Let’s begin…
The dried corms (Wikipedia: a short, vertical, swollen underground plant stem that serves as a storage organ) of jack-in-the pulpits can be sliced and eaten like potato chips!

Jack in the pulpit
Japanese knotwood can be eaten like asparagus…and I encourage this one due to its invasive nature!

Japanese knotwood
Coltsfoot can be candied and I’m still looking to find a patch big enough so that I can infuse the flowers into honey as a cough remedy!

Coltsfoot
Chopped toothwort root can be substituted for horseradish.

Toothwort
I also hit a ramp jackpot! They were everywhere!

Ramp overload!

Dinner!
Wandering around this way also leads to other beautiful finds like Squirrel corn (I don’t have any idea about its edibility, don’t try!)…

Squirrel corn. Hehe - such a funny name.
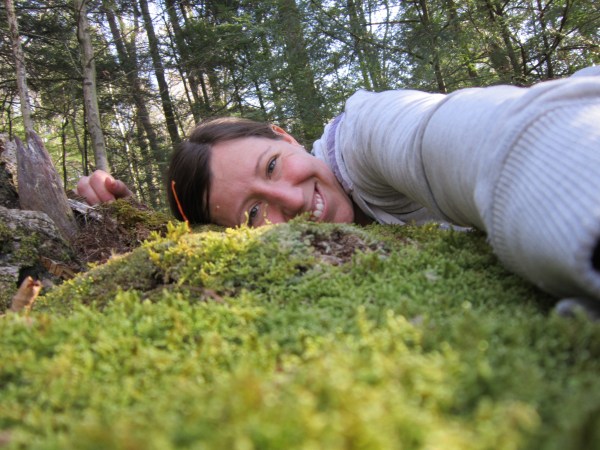
And you also might come across extremely cozy patches of moss at the edge of a ravine. This is my version of ultimate renewal and peace. I once read that some Native Americans believe that excess energy accumulates in places like this (i.e., cliffs, edges). I think they are right – it feels so wonderful! Why don’t I do this every day?


I’m happy to provide more information to anyone who’s interested!
Go be in nature! Give in to your animal instincts and go foraging!


Did you know that pine needles can provide you with more vitamin C than orange juice? And that they can help to heal your body from respiratory ailments, colds, and the flu?
Some say that the Native Americans taught the early settlers about drinking pine needle tea to help prevent death from scurvy!
Pine needle tea is easy to make, but what are some other things that can be done with pine needles?
They can be infused into a variety of menstrums (liquids used to extract the nutritional or medicinal properties of plants) other than water. For example, tonight I got a nice dose of vitamin C by using vinegar infused with pine needles in my salad dressing. White pine needle vinegar (the type I made) tastes similar to balsamic vinegar.
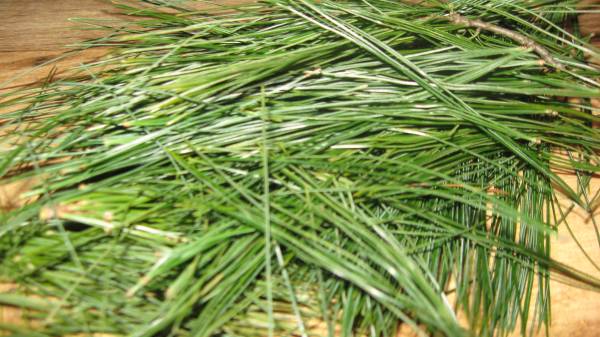
First, you’ll need to gather some needles. I collected a bunch from a white pine.

White pine needles
Pick through them to ensure the best ones are being added to glass jars. I also tore these up as I was adding them.

Fill the jar!
And then cover with the menstrum. In this case, it’s apple cider vinegar. I get large jugs of the raw kind so I boiled some first to ‘pasteurize’ it before making this vinegar (and I was able to boil enough extra for future use). Make sure to completely cover the needles — poke them down so that they’re an inch below the liquid line.

Let the finished product sit for 4-6 weeks before using. Also, use a plastic lid or put a piece of wax paper on top because vinegar will eat away at the lid.

White Pine Vinegar ready to be strained!
What’s another use for the pine needles? Infuse them in olive oil! The oil can then be used as a relaxing massage oil or as a chest rub to help with respiratory issues.
Cover a jar full of pine needles with the oil and let sit for 4-6 weeks.
 When you’re ready to use the oil, strain the needles out.

And you’re left with pine needle infused olive oil!

The oil can also be turned into a salve that can help to remove splinters (although it seems that the actual sap of a pine tree might be best at this!), or it can be put on small wounds to help them heal. I’ve also been having a fun time using it as a lip balm!
To make a salve, create an easy double boiler by putting a measuring cup into a pot of boiling water.
Add 2 Tablespoons of beeswax (I just guessed at the amount when I made this…) to the measuring cup and let melt.


After it has melted, add 2 ounces (1/4 cup) of the oil infused with pine. Stir with a chopstick until you reach an even consistency. Test to see if you’re done by putting a drop on your counter. It will allow you to quickly see if the salve is firm enough or too runny. Too runny? Add more beeswax. Too firm? Add more oil. 
When the mixture is consistent, pour it into a reused container and let sit to become a salve! Use and enjoy knowing exactly what went into your product!


Yesterday, a hike through one of my favorite places to be in nature revealed several gifts.
First, was a reminder of impermanence. Everything is always changing and it is best not to become attached to any objects, people, or situations. Strive to find happiness in each moment.
Everything will return to the Earth in time.


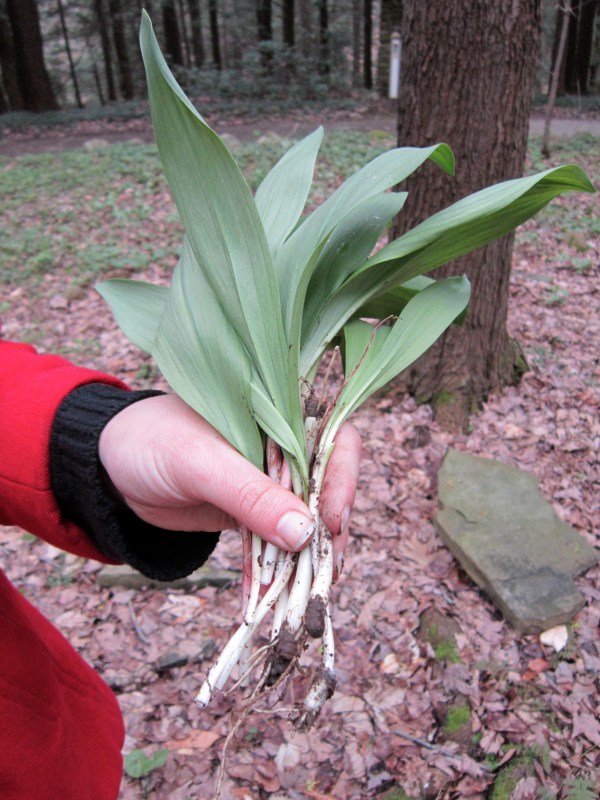
Second was a gift of free nourishment! We found wild ramps (Allium tricoccum), a perennial wild onion.

Patch of ramps
When you get closer, you can tell they’re ramps by the slight reddish-purple color where they meet the ground. And when you pull them, you’ll know they’re ramps by their characteristically onion smell.

Reddish-purple: yup, ramps!
I harvested several. It’s important that we’re not greedy when wild harvesting things so that we (and other creatures who depend on them) will have these foods in the future. Always leave many more plants than were harvested (some suggest harvesting every 4th ramp). Another idea is to just pull the ramp up from where it meets the ground — you’ll still get some of the onion, but the bulb will be left to grow again. Or even consider being regenerative with the onions and if you take some bulbs, use a few to start a new patch elsewhere.

Ramps for me; ramps for free
Ramps have sulfur compounds that are detoxifying for your body — try some today!
Also, did anyone else participate in this year’s Earth Hour?
It’s a fun way to show support for the Earth, be reminded of how much we depend on electricity, and to unplug for awhile! The camera-flash makes it look bright, but we had fun with candles as our only light for over an hour. I’d like to do this more often!

Candlelight night!

Harvesting wild foods is a great way to foster a sense of connection to nature. Not only does it get you outside, but you establish a relationship with a plant and are reminded that this process of taking food from the Earth has happened as part of every meal ever consumed. Being the one to do the taking yourself makes the connection all that much stronger (although it’s a beneficial exercise to think of how all of your food was handled before it got to you). Harvesting wild foods also fosters a sense of self-reliance and a beautiful feeling that we are a part of a continuous unfolding of life that cannot come from eating something packaged.
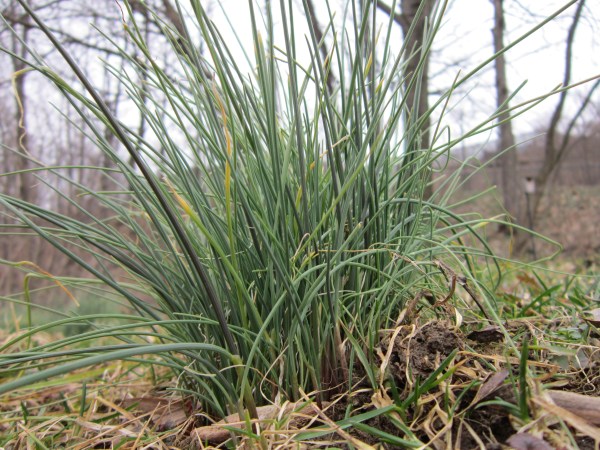
Wild chives (Allium schoenoprasum L.) are very similar to those grown conventionally, but with the added bonus that they can be found for free in moist areas! Despite being the middle of February, I recently was happy to come across a patch of land with several clusters.

Patch of Wild Chives
After inspecting them more closely and making sure that they had their characteristic chive smell (i.e., onion-y), I grabbed several to chop into vegetables for lunch. I also ate a few on the spot as it had been quite awhile since I had eaten food straight from the outdoors!

A few days later I wanted to try having even more fun with wild chives so I collected some in glass jars to bring home.

Harvesting more chives
Once home, I started the process of infusing them into olive oil. First, I cut them up into smaller pieces so that there was more surface area of plant matter. I put all of these chopped bits into a small glass jar.

Chives to chop

Filling the jar with chopped chives
After this, I poured olive oil over the top of the chives to completely cover all the green parts.

Covering the chives with oil
This oil should be refrigerated promptly and used within a day or two. The herbs can be strained for ease of use.

Chive-Infused Olive Oil
For more information on chives and to even discover some medicinal uses, see this web page: Wild Chives.
Happy chive hunting!

