Many people have jumped on the green juice bandwagon, and for good reason — these juices are a welcome addition of vitamins, minerals, and other nourishment to our diets. They work well at helping people to feel more energized and healthy. Unfortunately, many green juice recipes call for produce that is not always, if ever, in season in my region.
Are there other ways to get a local, sustainable, and easy punch of chlorophyll, vitamins, and minerals?
Why yes there is. Hello lady nettle.

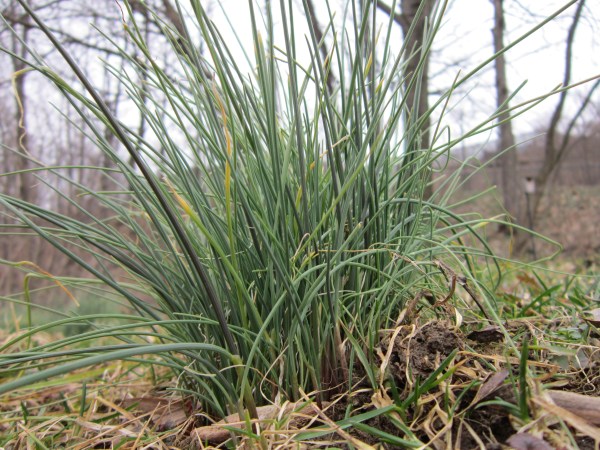
Stinging Nettle (Urtica dioica)
I remember my first encounter with nettle. It happened as a young child when I was helping my mother to weed the garden. I innocently pulled this ‘weed’ and soon thereafter had a nasty irritation all over my hand. Ow, nettle! She certainly has evolved an excellent defense mechanism.
Luckily, that early interaction did not deter me from learning about nettle and her many benefits.
Susun Weed reports an impressive list of nourishment found in nettle:
{Note from 1/2016: As discussed in the comments, there is some debate about the actual amounts of vitamins and minerals found in these infusions and whether fat-soluble vitamins A, D, and K can be assimilated in this form. Please see the comments for a link to another analysis of vitamin & mineral content in infusions. Either way, it is without a doubt that adding infusions to your life will increase the vitamins and minerals you’re consuming and have certainly made a difference for many people’s overall health.}
Nettle is a superior source of protein; 10 percent by weight.
Nettle is a rich storehouse of readily-absorbable minerals, trace minerals, and micro-nutrients:
calcium (1000 mg per quart of infusion)
magnesium (300 mg per quart of infusion)
potassium (600 mg per quart of infusion)
zinc (1.5 mg per quart of infusion)
selenium (.7 mg per quart of infusion)
iron (15 mg per quart of infusion)
manganese (2.6 mg per quart of infusion)
plus chromium, cobalt, phosphorus, copper, sulphur, silicon, and tin.
Nettle is super-charged with vitamins:
Vitamin A (5000 IU per quart of infusion)
Vitamin B complex, especially thiamin, riboflavin, niacin, and folate
Plus Vitamin C, Vitamin D, and Vitamin K
All of this combines to provide an excellent source of energy and nourishment that is easy to come by and easy to use!
After experimenting with nettle infusion for about a year now, I would not turn back and I drink this infusion about 3-4 times a week. I find that I crave the nourishment of this drink when I haven’t had it for a few days. When I drink it, I feel as though I am drinking Earth milk (but I have not tried it on cereal!). I feel nourished and more connected with the natural world. Plants (commonly considered weeds!) right outside my door can contribute to my health and well being.
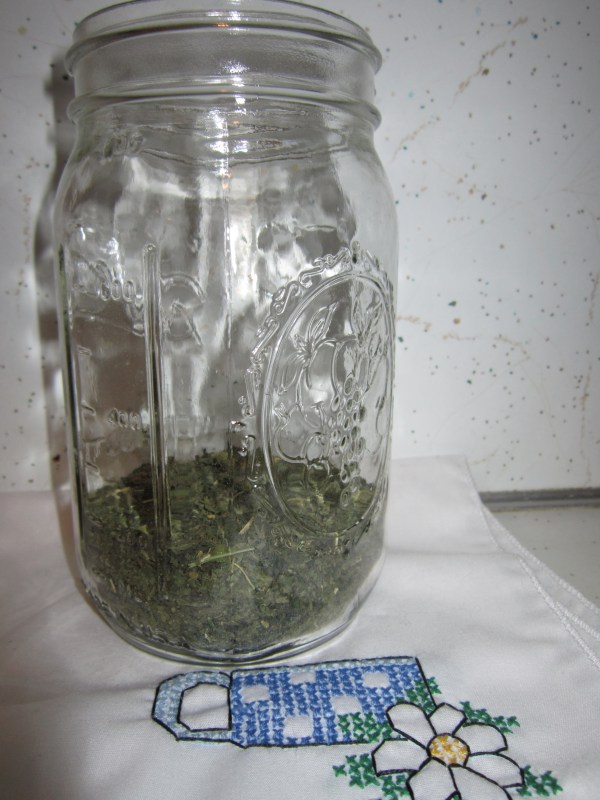
The process starts by measuring out an ounce of dried nettles. I’ve seen other people write about nettle infusions using just a few tablespoons of herb — this will still be a healthy drink, but won’t pack quite the same punch of minerals. When I was beginning, I measured this ounce out with a scale, but I have since measured nettle out enough times to simply visualize an ounce of the herb in my quart jar.

Ounce of dried nettle
Next, I boil water and distract myself with teeth brushing or other before-bed chores. When the water is ready, I pour it over the herb, seal the jar, and am off to bed. The minimum time to leave an infusion is 4 hours, but it is fine to leave it overnight.
(Tip: pour the water over a knife placed across the jar lid to help diffuse the heat and avoid breaking jars!)

Nettle infusion ready to sit for the night
In the morning, I strain the herb and drink the resulting infusion throughout the day. I drink it cold and straight out of the fridge, but it could also be warmed. When I first started drinking nettle I added honey a few times to see if I preferred it that way (I didn’t, but I know that others do. Mint is also a popular addition — just add a tablespoon to the ounce you measured out.).

Straining the infusion
What isn’t used right away can be stored in the refrigerator for several days. If it isn’t used in that amount of time, it can be used as a hair rinse or to water houseplants.
Don’t forget to compost leftover herbs!
So where do you get this much nettle? It’s awesome if you can harvest it somewhere local to you, but Mountain Rose Herbs is my favorite source for organic bulk herbs. You can find their nettle HERE.
FTC DISCLOSURE: As a way to support my blogging and related activities, I may receive monetary or other compensation for my endorsement, recommendation, testimonial and/or link to any products or services within this article. However, it is my promise to you that I am sharing my honest opinion and that I only recommend products or services that I have personally used or recommend and are in alignment with Light Footsteps ideals.