Reminder: Make Pico de Gallo

I’m sure a lot of people who read this blog already have their own favorite pico de gallo recipes, but I’m here to remind you that it’s that time of year — time to mix those tomatoes, onions, and peppers together and feast on the splendor! Continue reading

Ramps, Barley, & Beans

As the wheel of the year keeps turning us further into spring, it is already nearing time to say goodbye to ramps which are generally only around for harvesting for about 4-6 weeks each spring.
I think I made good use of them this year, but a recent recipe I came across seemed like a good one to squeeze in before the season officially ends.

Here are the ingredients from the original recipe:

  • 4 cups low-sodium chicken stock
  • 1/2 cup hulled barley, rinsed
  • 1/2 pound ramps, whites and greens separated and sliced
  • 1 stalk celery, thinly sliced
  • Coarse salt and ground black pepper

And here is what I used instead:

  • 2 cups vegetable broth and 2 cups whey (from my recent ricotta trial!)
  • 3/4 cups hulled barley, rinsed
  • 15 ramps, whites and greens separated and sliced
  • Salt & Black pepper
  • 15 Oz. kidney beans

I thought this recipe would be better with the addition of some protein (the beans), I excluded a vegetable that is not in season (the celery), and I was excited to try my whey as a stock in addition to some vegetable stock!  I also added some additional barley, but you might want to add even more if you give this recipe a go.

Directions:

  1. First add the broth, barley, and the ramp whites to a stock pot. Bring to a boil and simmer 45 minutes.
  2. After the simmering, add the greens and take half of the mixture and puree it in a blender to make it creamier.
  3. Return the mix back to the pot, add the beans, and cook until everything is warmed.
  4. Done!

Ramp, barley, and beans soup

I’m not sure why my version doesn’t seem nearly as green & creamy as the photo used by the magazine.  Maybe this is because I didn’t use my good blender (too much clean-up to make soup!), or because I didn’t use enough ramp greens (some were yellowing as the season ends…), or maybe they were cheaters and used food coloring!

Either way, the meal was tasty & (mostly) local, but would have been better if I had found time to bake bread to go with it!  Next time…

Also on ‘these light footsteps’:

Local Cooking: Making Friends with Kale

When you make the decision to start incorporating more local and seasonal foods into your diet, it can initially be overwhelming because not many of us are used to working with the foods that are found in seasonal abundance.  It forces us to get a bit more creative with our cooking.

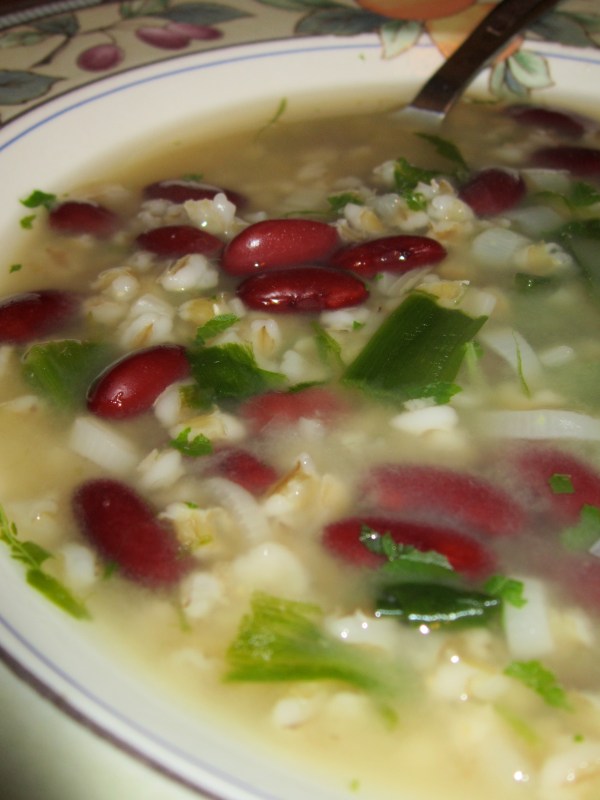
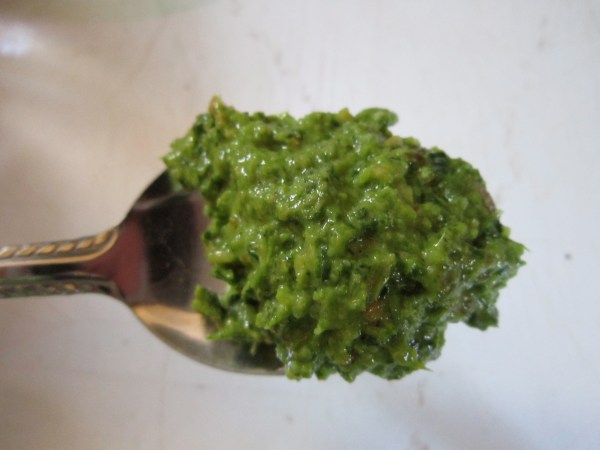
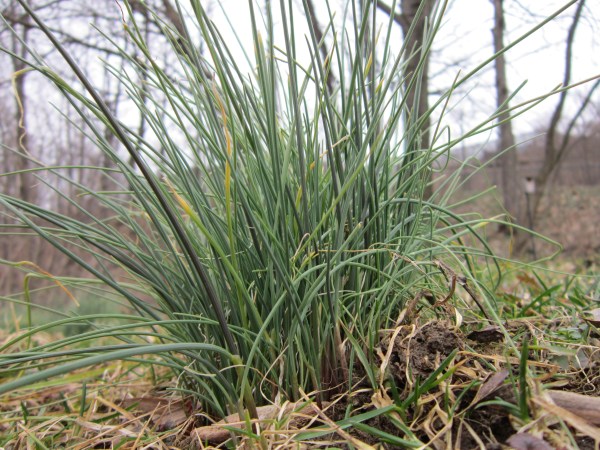
So for example, with ramps being abundant right now I’ve made them into pesto, chopped them into salads, sauteed them as toppings, and yesterday I tried what I’ve gathered to be the “authentic” West Virginian way to eat ramps — with beans (and cornbread). And I still have a few more tricks up my sleeve before the ramps disappear! (Stay tuned…)

Ramps and beans (and mushrooms)!

Another popular item at farmers’ markets in the Spring is kale.  I suppose I had started to learn about kale before trying to be quite as much of a locavore as I am today, but it’s definitely not something that I grew up eating. And when you’re not used to eating greens like kale and collards, they can be intimidating. But greens like kale are good to incorporate because they’re so darn healthy!

I think I first started to actually like kale because of kale chips.  I believe they’re relatively palatable even to the novice kale eater, and yet they start to break you in to kale’s bitter charms.

There are many types of kale chips to make, but I think it’s best to smother kale in a delicious tahini sauce.

TAHINI KALE CHIPS

Kale Chips

Kale Chips

  • ~2 Bunches kale
  • 1/4 cup tahini,
  • 1/8 cup soy sauce (or Bragg’s liquid aminos)
  • 1/8 cup apple cider vinegar
  • some sprigs of parsley and oregano (and I added some purple dead nettle that was also growing nearby my parsley and oregano…why not?)
  • 2 cloves of garlic
  • 1-2 Tbs. nutritional yeast
  • dash of salt
  • enough water to mix well…probably 1/8 cup

Break the kale into bite-sized pieces and place into a large bowl (take out any of the thick stems).  Mix all of the other ingredients in a blender, and then pour the sauce over the chips and mix it in well.  Lay the coated chips out on dehydrator sheets or oven sheets.

Dehydrate at 115* for about 4 hours or until really crispy (some recipes call for up to 8 hours — I did this last batch for 6).  You can also use an oven at 200* for about an hour, but check it often.  I’m sure that some people have mastered the oven version of kale chips, but I haven’t had luck with that.

I realize that not all of these ingredients are local, but I think this is a good place to start experimenting with kale.  And you can try to get as many of these ingredients as locally sourced as possible.

However, I was also able to devise a more locally-sourced kale recipe this week…

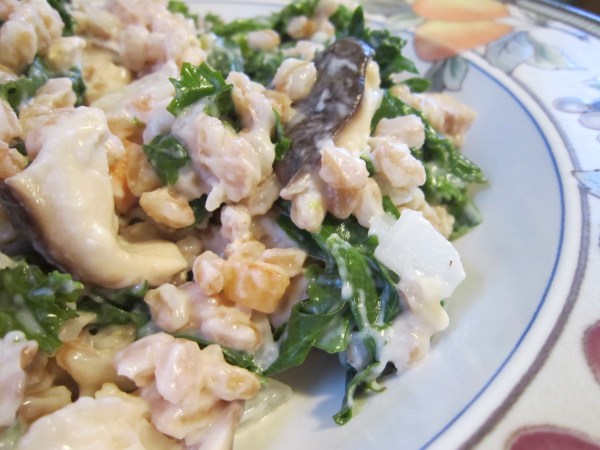
FARRO WITH KALE, SHITAKE MUSHROOMS, AND CHEVRE

I found some star ingredients at the farmers’ market that I was inspired to combine into this dish.

  • 2 cups warm, cooked farro (but I made a lot more than this — freeze some for later!) To cook farro: boil the grain in a 2:1 ratio of water (lightly salted) to farro. Simmer covered for 25 to 35 minutes. Drain any unabsorbed liquid.
  • 1/2 cup carrots
  • 1/2 cup onions
  • 4 cloves garlic
  • enough butter to saute
  • 4-5 cups of kale
  • 2-3 cups of shitake mushrooms
  • 2 oz. chevre
  • salt/pepper to taste

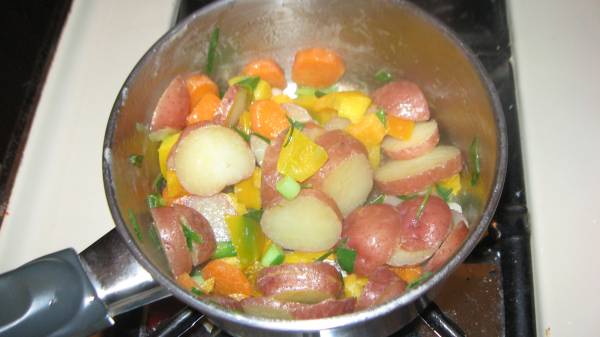
Start by sauteing the carrots, onions, and garlic in the butter until they’re soft and the onions are translucent.  Add the mushrooms and cook for about 2 minutes.  Add the kale and watch for it to wilt a bit and turn a darker color of green — this means it’s getting close to ready, and you can add the 2 cups of warm, cooked farro.

Stir it up

Mix all of this together and then add the chevre.  Keep stirring this while the heat is low until the cheese is melted in and creamy.  Local and delicious!

Farro with shitake mushrooms, kale, and chevre.

Linked up on the Homestead Barn Hop.

Also on ‘these light footsteps’:

Enhanced by Zemanta

Ramp + Oregano Pesto. Mmm.

Wow. My brain’s pleasure neurons are still lighting up after discovering this one. Ramp + Oregano pesto, you have won over my heart and my mouth.

Ramp + Oregano Pesto Goodness

This week at the Tremont farmers’ market, one of my favorite farmers (from Por-Bar Farms) had a deal on ramps and oregano with the suggestion of making a pesto.  I hesitated for a moment as I’ve been collecting so many of my own ramps, but I haven’t gathered any for a few days so I went ahead and got the deal. I am happy that I did as this makes a fantastic pesto!!

I looked around at quite a few recipes today, but didn’t find anything quite perfect enough for me, so I took what I learned and developed my own.

To make something similar, you will need:

  • 15 ramps
  • a bunch of oregano (mine was about 1 packed cup)
  • 1/3 cup olive oil (and I added about a Tbs extra when blending)
  • 1/4 cup toasted nuts (I thought I had some local nuts in the cupboard, but I ended up using pine nuts)
  • 1/4 cup hard cheese (something like parmesan)

First, you’ll need to chop the ramps.

Chopped ramps

Then you’ll need to pull off the oregano leaves and tightly fill a cup.

Bunch of oregano.

1 Packed cup of Oregano.

Measure out a heaping 1/4 cup of nuts and toast them.  Pine nuts need to be toasted for about 5 minutes.

Heaping 1/4 cup of pine nuts.

Toasting pine nuts.

Add these ingredients plus the olive oil and cheese in a blender or food processor, and mix it all together!  But don’t go for too long because it’s best to still have some texture in the pesto.

Pesto!

And then you can use this anywhere you desire an intensely awesome pesto! I tossed some of mine in a bit of tri-color pasta. Mmm. Depending on how much pesto you use at a time, I’d say this makes about 5 or 6 servings.  It’s about 1 cup of finished pesto product (I have a lot leftover and even was able to freeze some).

Pesto Pasta

My only warning is that it is a bit strong.  You can’t really give me too much onion/garlic, but if you’re sensitive to that taste, you may want to skip this recipe, or leave out some of the white bulbs of the ramps and focus on the green parts.

Also, I have to share that my salads are becoming increasingly exciting as the Spring picks up!  This 100% local side salad included lettuce, radish, mushroom, carrot, and cheese (not yet grated for this picture) all gathered from the farmers’ market.  Perfection!

Spring salad.

Enhanced by Zemanta

Roasted baby beets in quinoa with feta cheese!

I don’t know that I had ever even tried beets before getting serious about eating locally.  The weird canned ones on some salad bars didn’t exactly cry out, “eat me!”.

But, alas, they are often at the farmer’s market when other produce is lacking, and  I’m happy to have developed a relationship with beets because they are high in fiber, anti-inflammatory, and antioxidant.   I’ve come to enjoy them the more that I’ve played around with them, but I’ve never thought, “Wow, this is so delicious!” while eating them.  I’m happy to announce that this is no longer the case and I have crafted a winning recipe.

Roasted beets in quinoa with feta cheese!

The farmer’s market that I frequent most has been held biweekly through the winter.  This has been wonderful because it at least ensures that I am always buying eggs and cheese from people that I trust and who recognize me as a regular.  (This is not true for eggs and cheese sold at the grocery store!)  There has also been a fairly steady supply of root vegetables and some greens grown in hoop houses.  This past Tuesday, one of my farmer’s had baby beets that I purchased.

I also picked up some feta cheese from a local creamery.

A lot of recipes for beets involve feta cheese so I decided to use this relationship.  I also had made extra quinoa the night before and decided it should all be mixed together.  It worked splendidly.

I cut the tops off of the beets but left some of the stems, washed them, placed them in an oven-safe pan, and then drizzled them with olive oil + a touch of salt.

I put them into a 400 degree oven for 30 minutes and made sure they were done after the allotted time by poking them with a fork.  They were ready!

Next, I peeled off the beet skins using a towel so that I didn’t burn my fingers.

I cut some of the beets in half, tossed them into a bowl holding the (warmed) quinoa, and also mixed in some bits of feta cheese. Yum! The combination made the beets taste very sweet and it contrasted well with the feta cheese.  I’m sure the fact that these beets were fresh and recently harvested helped a lot, too!

Hooray for local, seasonal food!!

Steps Back to Nature: Harvesting Wild Chives

Beautiful chives!

Harvesting wild foods is a great way to foster a sense of connection to nature.  Not only does it get you outside, but you establish a relationship with a plant and are reminded that this process of taking food from the Earth has happened as part of every meal ever consumed.  Being the one to do the taking yourself makes the connection all that much stronger (although it’s a beneficial exercise to think of how all of your food was handled before it got to you).  Harvesting wild foods also fosters a sense of self-reliance and a beautiful feeling that we are a part of a continuous unfolding of life that cannot come from eating something packaged.

Wild chives (Allium schoenoprasum L.) are very similar to those grown conventionally, but with the added bonus that they can be found for free in moist areas! Despite being the middle of February, I recently was happy to come across a patch of land with several clusters.

Patch of Wild Chives

After inspecting them more closely and making sure that they had their characteristic chive smell (i.e., onion-y), I grabbed several to chop into vegetables for lunch. I also ate a few on the spot as it had been quite awhile since I had eaten food straight from the outdoors!

A few days later I wanted to try having even more fun with wild chives so I collected some in glass jars to bring home.

Harvesting more chives

Once home, I started the process of infusing them into olive oil.  First, I cut them up into smaller pieces so that there was more surface area of plant matter. I put all of these chopped bits into a small glass jar.

Chives to chop

Filling the jar with chopped chives

After this, I poured olive oil over the top of the chives to completely cover all the green parts.

Covering the chives with oil

This oil should be refrigerated promptly and used within a day or two.  The herbs can be strained for ease of use.

Chive-Infused Olive Oil

For more information on chives and to even discover some medicinal uses, see this web page: Wild Chives.

Happy chive hunting!

100% Local Red Skin Potato Recipe

During the summer, I try to eat at least 90% local when I’m cooking for myself. There’s no excuse not to with so many wonderful farmer’s markets around (and what I can grow myself!)! With limited time, I often put things together randomly, but I thought this particular dish turned out well! It’s simple, but wholesome.

I used:

-red skin potatoes (I used the little ones that had probably been sold to me in a pint carton)

-2 green onions

-1/2 sweet pepper

-fresh picked rosemary

-tablespoon or so of butter

-farmer’s market veggie cheese to top!

Mixing together..

1. Slice the potatoes and carrots and steam for ~10 minutes.

2. Meanwhile, go out to your garden (or fridge) and gather 2 green onions. Dice that (including some of the green leafy top) and the sweet pepper. My pepper was green- and yellow-colored.

3. Take the big tablespoon of butter and heat with some rosemary (I guess maybe a heaping Tbs.? Whatever you fancy!).  I did this in the pot at left to make step 4 easier. Add the onion and pepper and saute for ~3 minutes.

4. At this point, you can add the the potatoes and carrots. Mix well.

5. I love my farmer’s market cheese, so I grated some of that on top, but it’s not necessary!

6. Yum it up.

This was all that I ate for dinner that night, so this served one for me, but it could easily be for two if you had another little something to go with it.

Yum!